WebGL tombstone - lighting model
In the previous post we looked at how to deform a 3D mesh by using a depth map drawn onto a 2D canvas. In particular, we’d draw a pattern onto a canvas and have that pattern “carved” out of a slab of rock. There’s a live demo here, if you haven’t seen it already.
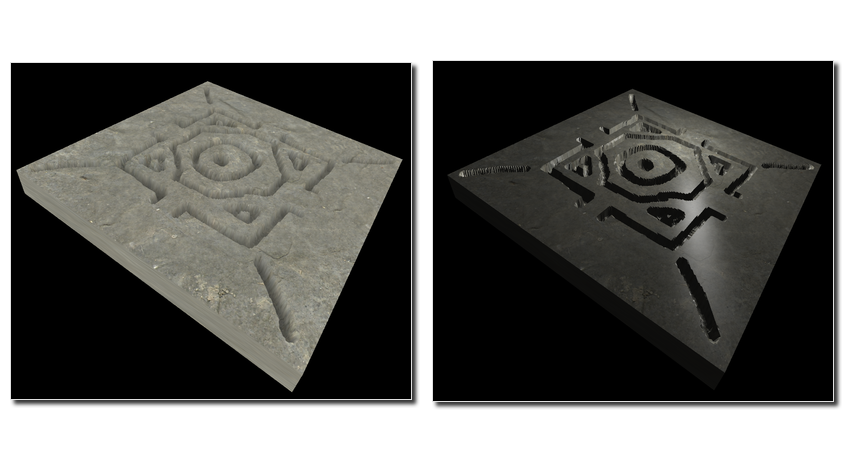
Last time, our model didn’t quite look right, while it was possible to perceive the depth of the carving, the depth didn’t look natural. This was because rather than applying any sort of lighting, we just colored the deeper part of the stone with a darker color. Today we’ll look at how we can do better, by introducing lighting into our scene.
Here’s a demonstration of the difference a little light gives, with the “depth-darkness” method on the left, and the lighting method on the right:
Lighting model
To calculate how our object should look with a light present, we will use the Blinn-Phong lighting model. Our lighting model will have 3 components:
- Ambient - this is just the flat colour of the object, it doesn’t take the light location into account.
- Diffuse - this is dependant on the angle of the incident light. The diffuse component will be highest when the normal of a surface points in the direction of the light source.
- Specular - this is dependant on angle of the incident light and the position of the camera. This is the component for the light that is reflected, as if the material was a mirror.
Here are 3 renders of a slab, the first with ambient light, the second with ambient & diffuse, and finally the third with ambient, diffuse & specular included:
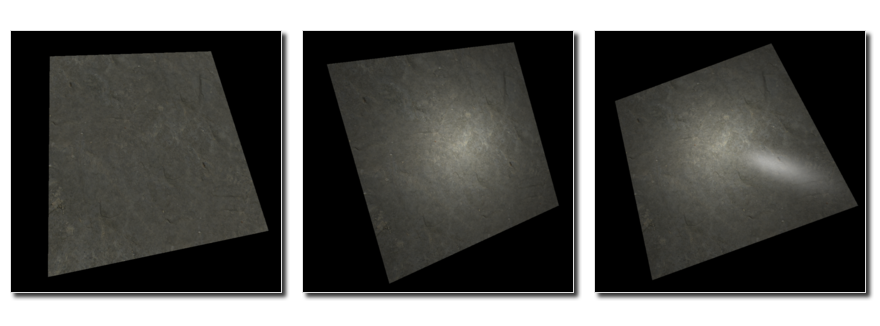
The ambient component we already had last time, so we just need to implement diffuse and specular components.
It’s worth playing with the demo to see how the different componets behave. In particular, the specular light will change as the camera position is moved, while the diffuse light will stay the same.
Normal vector
For our lighting calculations, one quantity is very important, and that is the normal vector at the point on the surface we are rendering. Recall that we used it to displace the surface in the previous post. However, by deforming the surface in the vertex shader, we changed the normals and as such we cannot use the normal that THREE.js passes in for our calculations, we will have to recalculate it. We’ll calculate it in fragment shader, as it is relatively simple to do - although as we’ll see, not without drawbacks.
What follows is some vector algebra, don’t worry if this isn’t 100% clear, as long as you understand what the surface normal is, the rest of this post will still make sense.
One way to obtain a normal of a surface is to take two vectors that lie in the plane of the surface, and take their cross product. Thus, if we can find two such vectors, we’ll have our normal.
Furthermore, lets say that our surface is defined some function, say p(x, y), where x and y are any two parameters that can be used to parametrise the surface. What these parameters are isn’t so important, just that by varying them, p will return a set of vector locations that define our surface. E.g. a flat xy plane might have p return the following:
p(0, 0) = {0, 0, 0}
p(5, 0) = {5, 0, 0}
p(5, 5) = {5, 5, 0}
p(0, 5) = {0, 5, 0}
A key insight is that we can get two vectors that lie in this plane by taking the derivative of p with respect to x and y, respectively. With this in hand we can use an extension to GLSL which does exactly this, allowing us to calculate the derivatives of any varying quantity with respect to x and y, which in this case are the screen coordinates. Note that it does not matter that these screen coordinates are not x and y in 3D space, the main thing is that as we vary them, p changes.
Ok, enough vector algebra, here’s how all this fits together into a function in GLSL:
#extension GL_OES_standard_derivatives : enable
varying vec3 vPosition;

vec3 getNormal() {
  // Differentiate the position vector
  vec3 dPositiondx = dFdx(vPosition);
  vec3 dPositiondy = dFdy(vPosition);

  // The normal is the cross product of the differentials
  return normalize(cross(dPositiondx, dPositiondy));
}
That’s it. With 3 lines of code, we can take an arbitrary mesh and obtain the normal, even if we’ve modified the geometry in the vertex shader.
Diffuse light
With our normal in hand, we are ready to calculate the level of diffuse light in our fragment shader. This is given by the dot product between the normal and the direction of the light. The dot product basically tells us how in line with each other these vectors are. Here are a couple of situations:
- 1 means they point in the same direction
- 0 means they are at right angles
- -1 means they point in the opposite direction
We can say straight away that for values of 0 or less, we won’t draw any diffuse light, as here the light is shining from behind the surface. For values greater than 0, we will draw an amount of diffuse light proportional to dot product. Thus our fragment shader will become:
void main() {
  vec4 color = texture2D(uTexture, vUv);
  vec4 dark = vec4(0, 0, 0, 1.0);
  vec3 normal = getNormal();

  // Mix in diffuse light
  float diffuse = dot(normalize(uLight - vPosition), normal);
  diffuse = max(0.0, diffuse);
  color = mix(dark, color, 0.1 + 0.9 * diffuse);

  gl_FragColor = vec4(color);
}
So, first we get the ambient color, by looking up the relevant pixel in our stone texture. Then we calculate the diffuse amount, capping off values smaller than 0 to 0. We then mix this in with our color value. Notice that even for a diffuse value of 0, we keep a bit of the ambient color, so that our object doesn’t completely disappear.
Specular light
With diffuse light under our belt, let’s tackle specular. Here we’re interested in the similarity (dot product) between the vector of the reflected light and vector from the surface to the camera. It can be shown that this can be formulated in terms of a halfway vector, which is a vector that is halfway between the light direction and the camera direction. Here’s how we’d calculate it:
// Mix in specular light
vec3 halfVector = normalize(normalize(cameraPosition - vPosition) + normalize(uLight - vPosition));
float specular = dot(normal, halfVector);
specular = max(0.0, specular);
specular = pow(specular, 50.0);
color = mix(color, light, 0.5 * specular);
One step that I didn’t mention above was the hardness of the specular light. This dictates how sharp our reflection is. For a low value of hardness, the specular light looks much like the diffuse light, but for higher values it looks more like a shiny reflection of the light. Adding in the hardness is achieved by taking our value for the specular intensity and raising it to a power representing the hardness.
End result
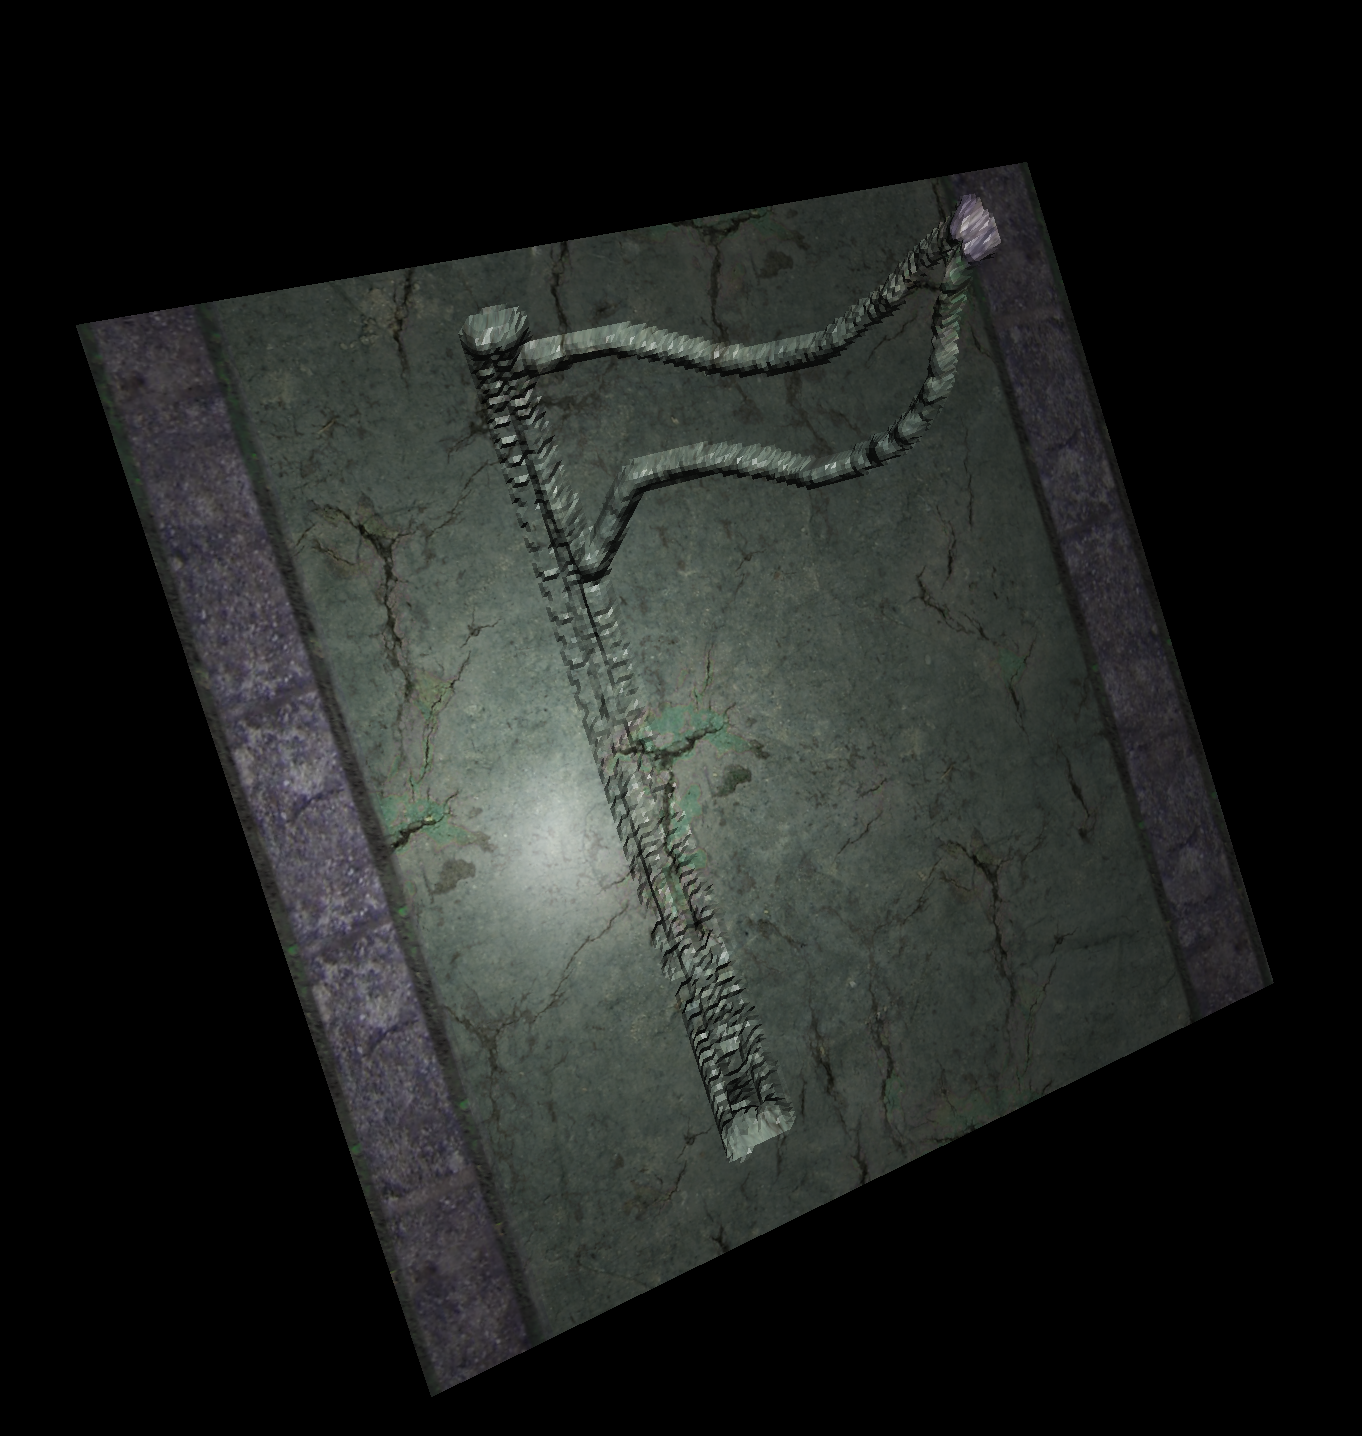
To best see what the end result looks like, try out the demo, where you can toggle where lighting is used. It’s also worth trying out running the code yourself, as you can vary the parameters and see how the lighting changes as a result. The code is up on github.
As you can probably see from the image above, there is a downside to this lighting model, namely that our surface looks “faceted”, i.e. it is obvious that it is made up of a finite number of faces. In a way, our normal calculation is “too good”, it exactly follows what the mesh shape is.
It would look much smoother if we didn’t calculate the normal at every fragment, but rather calculated it at every vertex, and then interpolated the normal between vertices, much like we did with the depth in the previous approach. We’ll look at this in a future post.